Do more with less.
Those four words can be anxiety-inducing for any property manager or leasing agent. As the demand for apartments continues to rise, rental offices are finding themselves with an ever-growing to-do list to not only keep their property functioning, but also to attract more leads.
Social media can be one of the most effective ways to improve your property’s reputation and attract potential residents. But it can also be seen as a burden to busy leasing teams that have more immediate tasks in front of them, like answering phone calls or giving tours.
There’s no question social media can be a time suck. The average instagram post takes anywhere between 30 minutes to an hour and a half to curate, edit and post. And good luck thinking of a clever instagram caption while your leasing office phone is ringing off the hook.
In this blog we will discuss some time-saving tips on how to create and schedule a month’s worth of social media content for your apartment community, so you can get back to your daily routine.
Content batching: The best kept secret for social media managers
Psst. Can you keep a secret? Do you ever wonder how your favorite social media accounts always have fresh, engaging content on your feed? Well, it’s likely that the professional accounts you follow do some sort of content batching.
Content batching is the process of creating multiple social media posts at one time, and scheduling them throughout the week or month.
How much time can you save by content batching?
Content batching can save you both time and energy if done consistently. As we stated before, an individual social media post can take anywhere from 30 minutes to an hour and a half to curate, edit, and post. Meaning you could save up to eight hours a week by batch creating your content.
What are the other benefits of content batching?
Not only will planning ahead help save you time, but it could improve your brand recognition and online reputation.
Branding: By creating all of your social media content at once, you ensure your branding remains consistent and your messaging is on point. This helps to build trust among your followers as your account appears more credible, professional and branded.
Creative energy: Have you ever stared at a blank computer screen for so long, you question whether you will have a creative thought ever again? Batch creating content helps to ease that creative burden by focusing on content when inspiration strikes (plus, now you have a backlog of ideas for those not-so-creative days).
Performance tracking: Was your meme on Monday a big hit, but the image you posted on Tuesday not so much? Residents seem to REALLY love your pet of the week posts, but reminders about Thursday’s fitness class didn’t move the needle. By creating several different kinds of posts with varying topics you can determine what your community responds to. Take that into your next planning session to improve your feed even more!
How to start batch creating content
- Research: Check out what posts have done well for your community in the past, and do a little sleuthing on your competition (we won’t tell). You can also check out the latest social media trends and see if there are any that you can adapt for your own channels.
- Gather assets: Once inspiration strikes, start gathering the assets you need. If you are highlighting areas or amenities within your community, try to shoot photos or videos at least three different angles. This will give you some variety when you begin editing (this will also help build a backlog of assets for you to repurpose later).
- Get organized: It’s helpful to have a folder of assets before you start creating to help keep you organized. There’s nothing worse than having to pause a creative breakthrough to find a PNG of your community logo. You can use the Respage Asset Library to upload any high-quality image or logo that might be useful. And don’t forget HEX color codes so you can keep your designs consistent.
- Start creating: Now is the fun part. Open up your favorite photo editor (we recommend Canva) and start creating! If this step is intimidating, don’t worry. Canva offers hundreds of free design templates that will help guide you. But here are a few extra tips to ease your mind:
- Keep it simple. Canva templates tend to include a ton of wingdings that look nice at first, but can become overwhelming (especially if you’re creating a month’s worth of content) so remember to keep it simple.
- Be consistent. Use a cohesive color palette and don’t mess with a ton of different fonts. Tip: Take a look at your property logo, and use only fonts and colors that match. This may feel like you’re suffocating your creativity at first, but in the end it will help your feed feel more consistent and professional.
- Double check the dimensions: There’s nothing worse than creating a perfect social media post only to realize it’s the wrong size.
- Keep it simple. Canva templates tend to include a ton of wingdings that look nice at first, but can become overwhelming (especially if you’re creating a month’s worth of content) so remember to keep it simple.
- Create some more: After you designed five or six posts, see if there are ways you can repurpose that content—and create some more! This will help avoid creative burnout. Can that post about a new blog be turned into an infographic later in the month? Or re-use that Pet of the Week pic to promote your community pet policy. Are you renovating an amenity on site? Plan to create multiple progress posts to take your residents along for the journey (this will not only help fill your content calendar, but will also provide transparency for your residents).
- Write your captions: Once you have a stock-pile of images and graphics, start brainstorming captions. There are a couple different ways to do this. You can caption each post individually (you may have already been doing this in your head as you were creating). Or you can begin jotting down clever captions to reference later. Maybe a brilliant one-liner won’t not work for this batch of posts, but it could come in handy later.
- Choose order of posts: Once you’ve gotten over the hurdle of creating your content, the next step is to decide when you want to post your new creations. The easiest way to do this is to place all of your time-sensitive posts first. Are you celebrating a staff birthday, or the grand opening of an amenity? National holidays and other time-sensitive event reminders can be placed on your social calendar first, then your remaining content can fill in the gaps.
- Decide the optimal time of day to post: This time can vary between accounts, platforms and even depending on the time of year. You may choose to do some research to find what works best for your community, but as a general rule of thumb, Tuesday-Thursday, anywhere between 8 am – noon is typically a good time to post on business accounts.
- Set up your calendar: Get excited, you’re almost there! The last step is deciding when to post your new creations, and scheduling them to post for you. Then, you can sit back and relax! (HA! Who am I kidding, we know you have a million other things to do—but at least you can cross social media off your list!)
How to set up a content calendar
Finding the right tool to set up your content calendar can be different for everyone.
On a budget? There are many websites that offer a basic content calendar that allows you to schedule your content across multiple social media platforms, but the tools are limited with free accounts.
If you’re looking for a multifamily-specific solution, Respage offers a centralized Social Calendar that helps you keep track of different properties and which channels need attention. With the Respage Social Calendar, you’re able to schedule content to your community Facebook, Instagram, Twitter and even your Google Business Profile.
For this How To section, we will walk you through the process of setting up your content calendar with the Respage solution, but most scheduling platforms have similar navigation options.
Let’s dive in!
- Open the Respage Dashboard, and navigate to social on the left-hand menu.

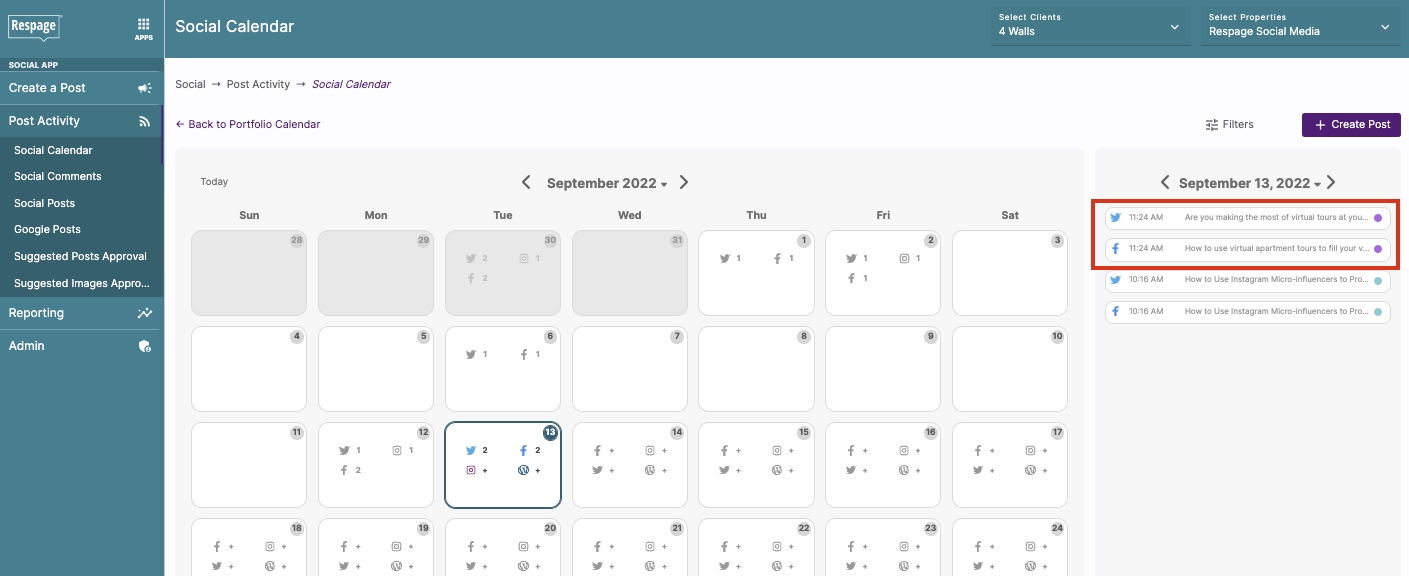
- Expand the Post Activity menu, and select Social Calendar.

- Select the Client and Property (for this example, we will use Respage social media). You can select one property, or multiple to view all of your campaigns at once.

Tip: If you have multiple properties selected, toggle the ‘Needs Attention’ switch to see which accounts have been stagnant. - Once you have selected the client and property, you will see the full calendar view. Scheduled posts for today’s date will preview to the right, and are color coded based on status (qued, pending, denied, published, and scheduled). You can navigate to different dates to see scheduled content. If no posts are scheduled for a certain day, the right-hand menu will display a red notice.
- Create a post by selecting the purple ‘Create Post’ button in the top right corner. You will be taken to a selection screen where you can choose Content Discovery, Social Share, WordPress Blogs, Google Events, and Google Offers. To post, you will select Social Share.
Tip: Don’t forget to come back later to check out the other features—especially Content Discovery if you hit a creative roadblock.
You can also create a post by selecting a social icon on a specific day in the calendar view. This option will bring you directly to the social share page and queue the post for the selected day.
- Add your content to the appropriate sections, keeping in mind that you can post to Facebook, Instagram, and Twitter simultaneously. The dashboard includes areas to add photos, video, and web links which will then autofill a preview for Facebook and Twitter.

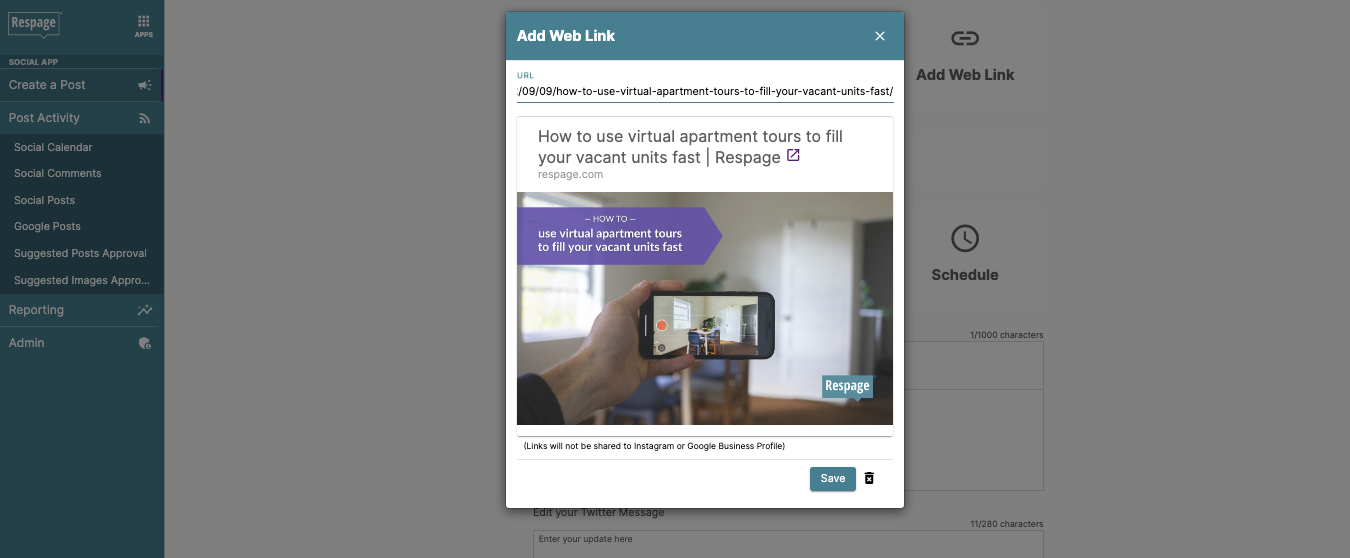
- Once your content is ready, you may select from three posting options: Auto post (the dashboard selects the best time to post), Post Now (to post immediately), and Schedule (to feed into your social calendar).

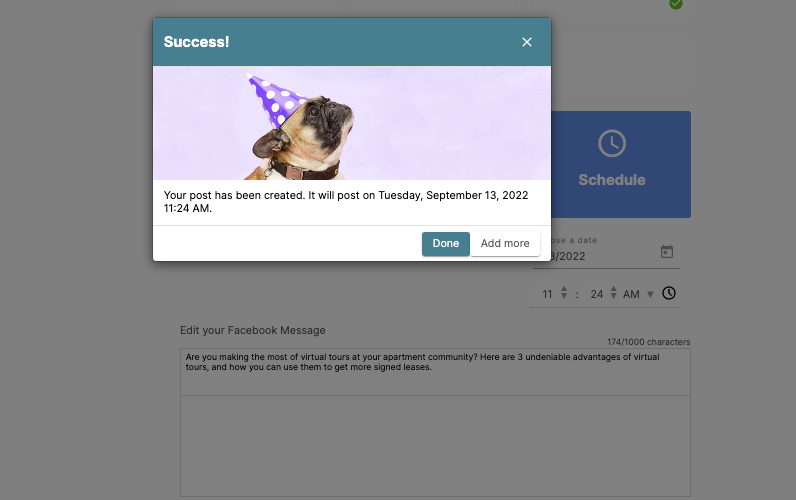
- Once your post is scheduled, head back over to the Social Calendar view. You will see your new posts queued on the right-hand menu, marked with a purple dot for scheduled. Once the post goes live, the status dot will turn blue.

- To edit posts or add a comment for your team, select the post from the right hand menu. Any posts that were created simultaneously can also be edited in one batch.
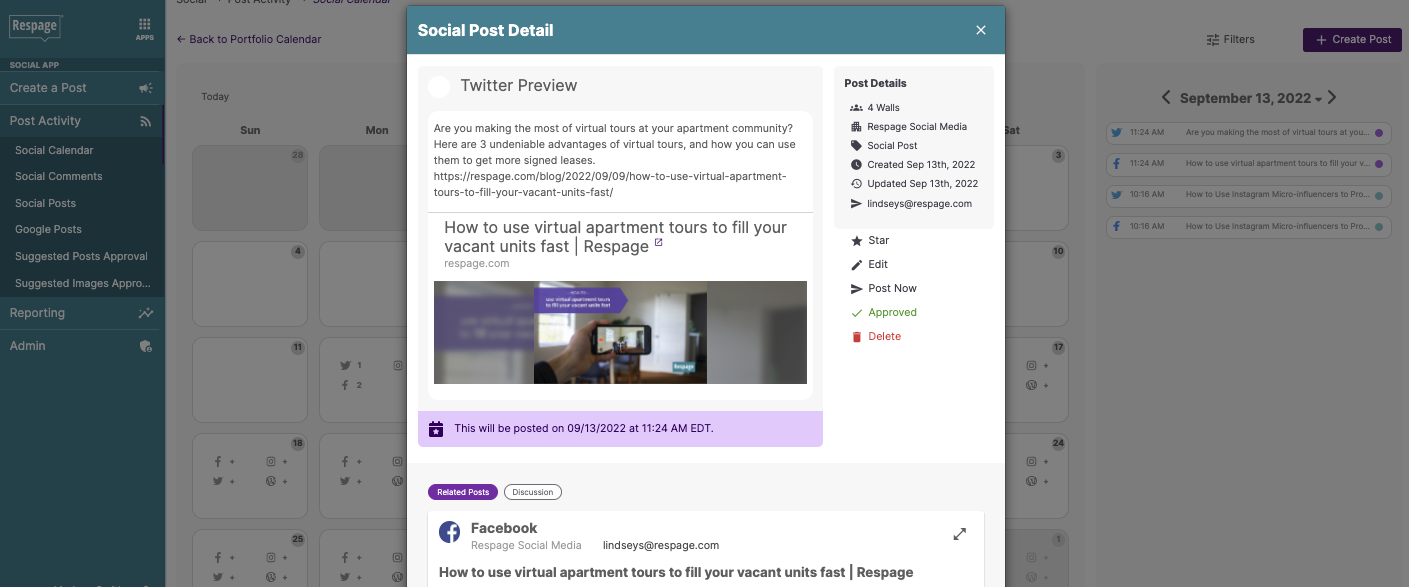
- Repeat the process until your calendar is full! Great work! Give yourself a little high-five to celebrate.

Social media planning takes practice
No question social media planning takes a large amount of time and creative energy. But with a little practice and the right tools, your apartment’s social media will be glowing in no time.
Still feeling overwhelmed by your social media duties? In addition to the tools to streamline social media, Respage also provides full-service social management with a dedicated team of multifamily social media experts. Click the button below to learn more.
